Documentation style guide
The Home Assistant documentation is written in Markdown, using the GitHub Flavored Markdown specification.
In general, the documentation should follow the Microsoft Style Guide. Where more detail is needed, Merriam-Webster Dictionary is used. Merriam-Webster is also used by the Microsoft Style Guide. This page collects some more specific guidance we follow additionally.
Language and tone
- The language used in the documentation is American English.
- Use a serial comma (also known as the Oxford comma) before the conjunction in a list of three or more items. For example, "Through the use of additional adapters, Home Assistant allows the use of Zigbee, Z-Wave, and other protocols".
- Follow grammar and syntax rules. For example, end sentences with a period.
- Avoid excessive use of em dashes (often used by AI). If you use an em dash, use the Merriam-Webster style, without spaces around the em dash.
- In general, consider splitting the sentence into shorter sentences.
- If the em dash is used to introduce a list, use a colon instead.
- If it is used for a parenthetical statement, consider using parentheses instead.
- Be objective and not gender-favoring, polarizing, race-related or religion inconsiderate. Contributions which do not follow this may be in breach of our Code of Conduct.
- Don't use "e.g.". Instead, use for example, such as, or like.
- Don't use "master/slave". Instead, use alternatives such as "client/server", "leader/follower", "main/replica", or "controller/device".
- The case of brand names, services, protocols, integrations, and platforms must match their respective counterparts. For example, "Z-Wave" not "Zwave", "Z-wave", "Z Wave", or "ZWave". Also, "Input Select" not "input select" or "Input select".
Formatting basics
The following are the most common formatting issues:
- There is no limit for the line length. Write in a flowing text style.
- Don't put two spaces after a period.
Headings
The first heading on a page is its title, defined in the front matter at the top of the page:
---
title: "Documentation style guide"
---
Use Markdown headings 2-6:
## Heading level 2
### Heading level 3
#### Heading level 4
##### Heading level 5
###### Heading level 6
Use sentence-style capitalization.
Don't skip heading levels.
Only heading levels 2 and 3 are shown in the right-hand table of contents.
Emphasis
To emphasize a word, use italics.
Use underscores (_) for italics, for example: _emphasized words_. Don't use asterisks (*).
Do not use ALL CAPITALS for emphasis.
UI elements and steps
To refer to UI elements, use bold.
Use double asterisks (**) for bold, for example: **bolded words**.
When writing UI steps, use the greater than character (>) in breadcrumbs.
Do not make it bold.
For example:
1. Under **Settings**, select the three dots menu.
2. Select **Restart Home Assistant** > **Quick reload**.
See also: My links.
Selecting a UI element
Avoid the verb "click". It is specific to using a mouse. Instead, use verbs that work with multiple devices, such as "select".
To describe specific mouse actions, you can use "click." For example, "right-click" or "double-click".
File paths, file names, variables, and text input
Use backticks when referring to file paths, file names, variable names, or a text that you enter in a field. For example
- The
/boot/config.txtfile - The
thisvariable - Enter
/newbot
Lists
-
For unordered lists, use
-, not*. -
For ordered lists, use increasing numbers.
# Good1. List item 1.2. List item 2.3. List item 3.# Bad1. List item 1.1. List item 2.1. List item 3.
Code blocks
Use Markdown code blocks, delimited by three backticks:
```markdown
1. Under **Settings**, select...
```
To include a code block in a code block (like the one above), use four or more backticks in the external code block:
In general, use Markdown code blocks, delimited by three backticks:

````markdown
```markdown
1. Under **Settings**, select...
```
````
After the opening backticks, you can specify the language used for syntax highlighting, for example:
markdownshellyaml
For all supported languages, see the list of Rouge lexers.
Tables
- Avoid the use of tables. Use lists instead. If you cannot avoid a table, minimize the number of columns and keep the amount of text as short as possible:
- Tables that are too wide can be difficult to browse on handheld devices.
- Less content makes tables easier to read.
- If your table has only two columns, it should probably be a list.
- When limiting the amount of text is not possible, consider using other data structures for representing the information. For example, lists or
{% configuration_basic %}can be used.
Links
-
Instead of the file's extension (
.markdown,.md,.mdx), use a forward slash. For example:[ZBT-2](/connect/zbt-2/)instead of[ZBT-2](/connect/zbt-2.markdown). -
When linking to pages in the same repository:
- Use absolute links, but ignore the
sourcedirectory. - Ignore the leading underscore (
_) in the first directory.
For example, to link to
source/_integrations/date.markdown, use:[Date](/integrations/date/). - Use absolute links, but ignore the
-
Do not use affiliate or tracking links.
-
Do not use bare URLs:
https://example.orgor<https://example.org>.
Images
If you use images, upload them to the images folder and related subfolder in the documentation repository.
Do not link to external images, for example on your private GitHub repository.
For screenshots, use the Markdown notation:

You can also use HTML:
- To invert the image colors when the documentation is viewed in dark mode, use HTML with the
invertDarkclass. - To include a caption, put it in the
<p>tag.
For example:
<p class='img'>
<img class='invertDark'
    src='/img/en/documentation/glossary-term_tooltip.png'
    alt='Styling of a glossary term tooltip'
  />
  Styling of a glossary term tooltip
</p>
To learn about images when adding an integration, see Images, icons, and logos.
Videos
Use the following syntax to reference a video from YouTube.
Use videoStartAt to have it start playback at a specific time in the video.
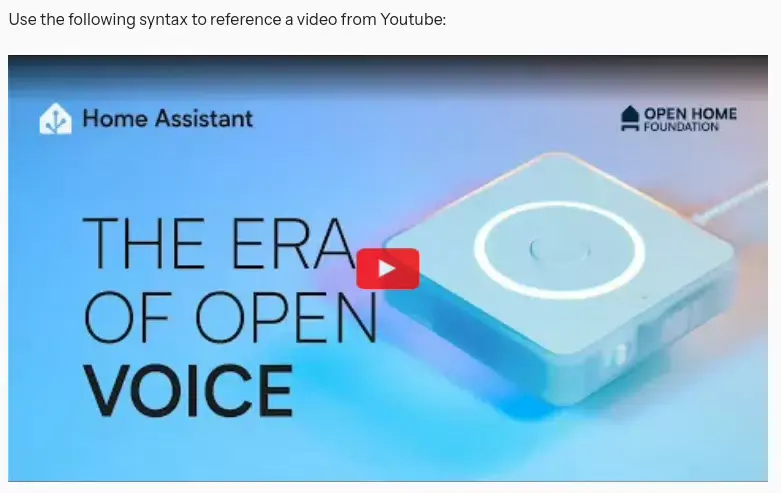
YouTube video starting at a specified time
For videoid use the part of a YouTube URL that comes after watch?v=.
<lite-youtube
  videoid="ZgoaoTpIhm8"
  videoStartAt="3907"
  videotitle="Introducing the Home Assistant Voice Preview Edition - Voice: Chapter 8"
></lite-youtube>
Reusable text
For some topics, there are predefined text elements that you can reuse.
To include a snippet from source/_includes, use the following Liquid syntax:
{% include path/to/file.md %}
For examples that are useful when documenting integrations, see Configuration.
Liquid syntax
We use Liquid syntax for templating in Markdown.
My links
To indicate a location in the UI, use a My link. Selecting a My link opens that page in their own Home Assistant installation.

Styling of My links
For example:
1. Go to {% my integrations title="**Settings** > **Devices & services**" %} and select your integration.
- {% my areas title="**Settings** > **Areas, labels & zones**" %}
- {% my automations title="**Settings** > **Automations & scenes**" %}
- {% my backup title="**Settings** > **System** > **Backups**" %}
- {% my general title="**Settings** > **System** > **General**" %}
- {% my logs title="**Settings** > **System** > **Logs**" %}
- {% my network title="**Settings** > **System** > **Network**" %}
- {% my profile title="**User profile**" %}
To identify a My link, in Home Assistant, open the page of interest and press the m key.
Glossary term reference
Some Home Assistant terms and concepts are explained in the glossary. If you add a reference to the definition of a term, the term definition is shown as a tooltip.

Styling of a glossary term tooltip
Syntax:
{% term <term> [<text>] %}
Usage examples:
{% term integration %}
{% term entity %}
{% term "configuration.yaml" %}
{% term "Home Assistant Operating System" %}
For more information on recommended glossary usage, see Glossary & terminology tooltips.
Acronyms and abbreviations
If possible, try to avoid using abbreviations and acronyms. If you want to use an acronym or abbreviation, you can add an abbreviation tag to show the full term as a tooltip.

Styling of an abbreviation tooltip
Examples:
<abbr title="Audio & video">A/V</abbr>,
<abbr title="current transformers">CT</abbr>,
<abbr title="Dutch smart meter requirement">DSMR</abbr>,
<abbr title="embedded MultiMediaCard">eMMC</abbr>,
<abbr title="flash video">FLV</abbr>,
<abbr title="Large Language Models">LLMs</abbr>,
<abbr title="Model Context Protocol">MCP</abbr>,
<abbr title="pan, tilt, and zoom">PTZ</abbr>,
<abbr title="real-time messaging protocol">RTMP</abbr>,
<abbr title="real-time streaming protocol">RTSP</abbr>,
or <abbr title="USB-On-The-Go">USB-OTG</abbr>.
Inline icons
To refer to an icon in the UI, you can use icons from the Iconify library.
![]()
Some inline icons
Usage examples:
- Three dots menu: {% icon "mdi:dots-vertical" %}
- Hamburger menu: {% icon "mdi:menu" %}
- Edit: {% icon "mdi:edit" %}
- Revert {% icon "mdi:restore" %}
- Eye: {% icon "mdi:eye" %}
- Trash: {% icon "mdi:trash" %}
- Cog: {% icon "mdi:cog" %}
- Cog outline: {% icon "mdi:cog-outline" %}
- Drag: {% icon "mdi:drag" %}
- Move-cursor: {% icon "mdi:cursor-move" %}
- Arrow left: {% icon "mdi:arrow-left-bold" %}
- Arrow right: {% icon "mdi:arrow-right-bold" %}
- Checkbox list: {% icon "mdi:order-checkbox-ascending" %}
- Upload network: {% icon "mdi:upload-network" %}
- Security network: {% icon "mdi:security-network" %}
- Routes: {% icon "mdi:routes" %}
Collapsible text blocks
Use a details block to make a text block collapsible, don't use the HTML5 variant, but use our Liquid variant instead.
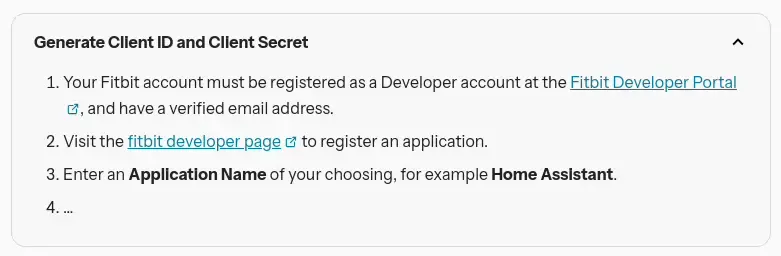
Behavior of a collapsible text block
For example:
{% details "Generate Client ID and Client Secret" %}

1. Your Fitbit account must be registered as a Developer account at the [Fitbit Developer Portal](https://dev.fitbit.com), and have a verified email address.
2. Visit the [fitbit developer page](https://dev.fitbit.com/apps/new) to register an application.
3. Enter an **Application Name** of your choosing, for example **Home Assistant**.
4. ...
{% enddetails %}
Text boxes
Use text boxes to highlight important information. Don't overuse them because they can visually overload the documentation.
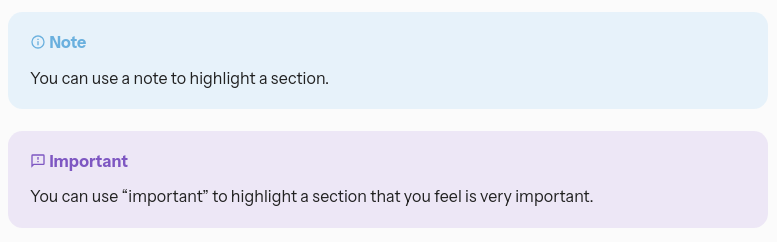
Example text boxes:
Tip
{% tip %}
Use a tip to feature a recommendation.
{% endtip %}
Note
{% note %}
Use a note to highlight a section.
{% endnote %}
Important
{% important %}
Use "important" to highlight a section that you feel is very important.
{% endimportant %}
Caution
{% caution %}
Use "caution" to advise against actions that may cause data loss, unintended behavior, or other consequences that are difficult to reverse.
{% endcaution %}
Warning
{% warning %}
Use a warning to alert users to risks that could compromise the security or integrity of their system, or cause physical harm.
{% endwarning %}
Labs
Use this text box when documenting features in Labs:
{% labs %}
Requires the **Feature Name** Labs preview feature. Enable it at {% my labs title="**Settings** > **System** > **Labs**" %}.
{% endlabs %}
Example YAML
Use this text box to provide interactive syntax highlighting for some elements. To see the example below rendered, see Automation: sync a ceiling fan speed to the ceiling light.
{% example %}
automation: |
  alias: "Match fan to ceiling light"
  triggers:
    - trigger: light.brightness_changed
      target:
        entity_id: light.living_room_ceiling
      options:
        threshold: 10
  actions:
    - action: fan.set_percentage
      target:
        entity_id: fan.living_room
      data:
        percentage: "{{ state_attr('light.living_room_ceiling', 'brightness_pct') | int }}"
{% endexample %}
The word from the first line (here: automation) is rendered above the code block.
Available words (defined in INPUT_TYPES in plugins/example.rb):
actionautomationconditionscripttemplatetrigger
Additionally, you can use output to render the result of the code.
It's useful when documenting templates.
For example:
{% example %}
template: |
  {% from 'formatter.jinja' import format_entity %}
  {{ format_entity('sensor.outdoor_temperature') }}
  {{ format_entity('sensor.indoor_temperature') }}
output: |
  Outdoor temperature: 22.5
  Indoor temperature: 21.0
{% endexample %}
```liquid