Documentation structure and example text
This page shows examples of the available documentation features (such as inline icons, text box, links to related topics, and glossary entries). It also shows the documentation structure.
Use this template together with the following documentation:
- The integration documentation template in the home-assistant.io repository under /_integrations/_integration_docs_template.markdown.
- Documentation standard.
- General style guide.
- The documentation rules of the Integration Quality Scale.
Inline text elements
This section shows elements you can use within your text.
My links
To indicate a location in the UI, you can use a My link. Selecting a My link opens that page in their own Home Assistant installation.
For example: "Go to {% my integrations title="**Settings** > **Devices & services**" %} and select your integration."

Screenshot showing the styling of my links
Examples
- {% my areas title="**Settings** > **Areas, labels & zones**" %}
- {% my automations title="**Settings** > **Automations & scenes**" %}
- {% my backup title="**Settings** > **System** > **Backups**" %}
- {% my general title="**Settings** > **System** > **General**" %}
- {% my logs title="**Settings** > **System** > **Logs**" %}
- {% my network title="**Settings** > **System** > **Network**" %}
- {% my profile title="**User profile**" %}
To identify a My link, in Home Assistant, open the page of interest and press the m key.
Formatting
- Use bold when referring to UI strings: Settings, Areas, labels & zones
- Use backtick when referring to file paths, file names, variable names, or a text that you enter in a field: the
/boot/config.txtfile, thethisvariable, enter/newbot.
Glossary term reference
Some Home Assistant terms and concepts are explained in a Glossary. If you add a reference to the definition of such a term, the term definition is shown as a tooltip.

Screenshot showing the styling of a glossary term tooltip
Examples
{% term integration %}
{% term entity %}
{% term "configuration.yaml" %}
{% term "Home Assistant Operating System" %}
You can find the full list of glossary terms on the Glossary page. To learn more about glossary terms, refer to the developer documentation on glossary.
Acronyms and abbreviations
If possible, try to avoid using abbreviations and acronyms.
If you want to use an acronym or abbreviation, you can add an abbreviation tag to show the full term as a tooltip.

Screenshot showing the styling of an abbreviation tooltip
Examples
<abbr title="Audio & video">A/V</abbr>,
<abbr title="current transformers">CT</abbr>,
<abbr title="Dutch smart meter requirement">DSMR</abbr>,
<abbr title="embedded MultiMediaCard">eMMC</abbr>,
<abbr title="flash video">FLV</abbr>,
<abbr title="Large Language Models">LLMs</abbr>,
<abbr title="Model Context Protocol">MCP</abbr>,
<abbr title="pan, tilt, and zoom">PTZ</abbr>,
<abbr title="real-time messaging protocol">RTMP</abbr>,
<abbr title="real-time streaming protocol">RTSP</abbr>,
or <abbr title="USB-On-The-Go">USB-OTG</abbr>.
Inline icons
To refer to an icon in the UI, you can use icons from the Iconify library.
![]()
Screenshot showing some inline icons
Examples
- Three dots menu: {% icon "mdi:dots-vertical" %}
- Hamburger menu: {% icon "mdi:menu" %}
- Edit: {% icon "mdi:edit" %}
- Revert {% icon "mdi:restore" %}
- Eye: {% icon "mdi:eye" %}
- Trash: {% icon "mdi:trash" %}
- Cog: {% icon "mdi:cog" %}
- Cog outline: {% icon "mdi:cog-outline" %}
- Drag: {% icon "mdi:drag" %}
- Move-cursor: {% icon "mdi:cursor-move" %}
- Arrow left: {% icon "mdi:arrow-left-bold" %}
- Arrow right: {% icon "mdi:arrow-right-bold" %}
- Checkbox list: {% icon "mdi:order-checkbox-ascending" %}
- Upload network: {% icon "mdi:upload-network" %}
- Security network: {% icon "mdi:security-network" %}
- Routes: {% icon "mdi:routes" %}
Collapsible text block
Use a details block to make a text block collapsible:

Screenshot showing a collapsible text block
Example
{% details "Generate Client ID and Client Secret" %}

1. Your Fitbit account must be registered as a Developer account at the [Fitbit Developer Portal](https://dev.fitbit.com), and have a verified email address.
2. Visit the [fitbit developer page](https://dev.fitbit.com/apps/new) to register an application.
3. Enter an **Application Name** of your choosing, for example **Home Assistant**.
4. ...
{% enddetails %}
Text boxes

Screenshot showing text boxes:
Examples
{% tip %}
You can use a tip to feature a recommendation.
{% endtip %}

{% note %}
You can use a note to highlight a section.
{% endnote %}

{% important %}
You can use "important" to highlight a section that you feel is very important.
{% endimportant %}
Reusable text
For some topics, there are predefined text elements that you can reuse.
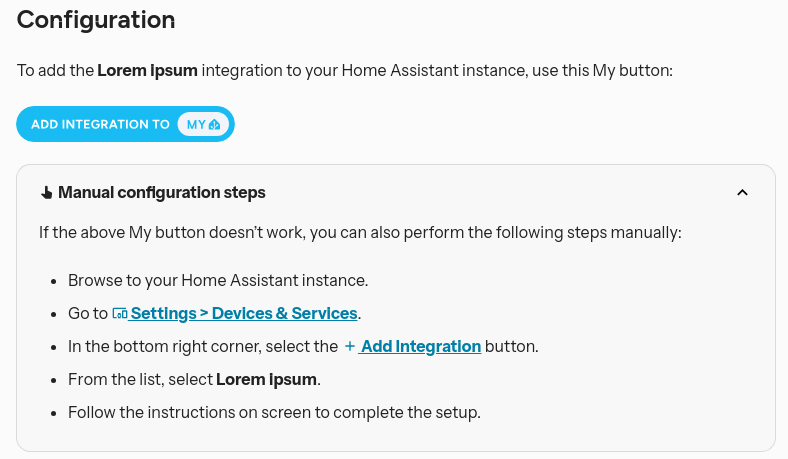
Configuration

Screenshot showing the predefined configuration text block
To use this element, add the following line:
{% include integrations/config_flow.md %}
Configuration_basic block
Use the configuration_basic block to describe configuration options if your integration is set up via a config flow.

Screenshot showing a configuration variable block for integrations that are set up in the UI
{% configuration_basic %}
Host:
    description: "The IP address of your bridge. You can find it in your router or in the Integration app under **Bridge Settings** > **Local API**."
Local access token:
    description: "The local access token for your bridge. You can find it in the Integration app under **Bridge Settings** > **Local API**."
{% endconfiguration_basic %}
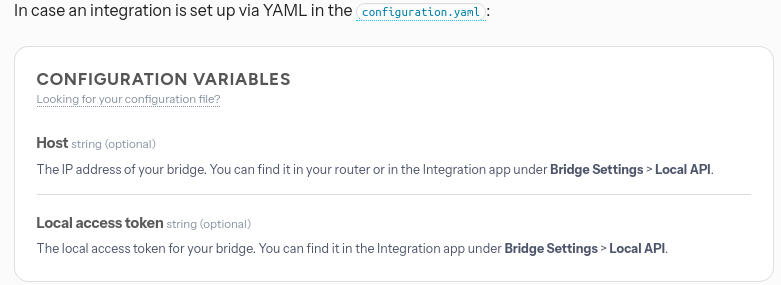
Configuration block for YAML integrations
Use the configuration block to describe configuration options if your integration is set up via YAML only.

Screenshot showing a configuration variable block for YAML integrations
{% configuration %}
Host:
    description: "The IP address of your bridge. You can find it in your router or in the Integration app under **Bridge Settings** > **Local API**."
    required: false
    type: string
Local access token:
    description: "The local access token for your bridge. You can find it in the Integration app under **Bridge Settings** > **Local API**."
    required: false
    type: string
{% endconfiguration %}
Images
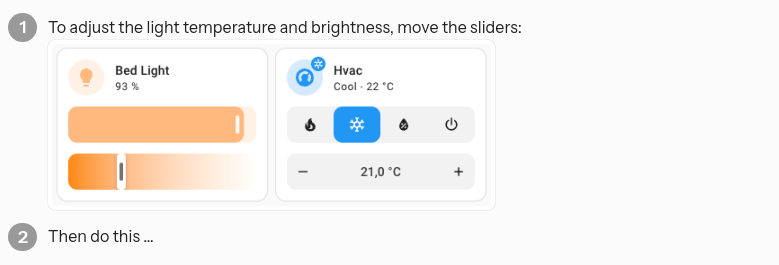
In general, use the Markdown syntax to add images. For example, when adding an image to illustrate a step:

Markdown syntax to add an image:
1. To adjust the light temperature and brightness, move the sliders:

2. Then do this ...
To add an image with caption, you can use HTML syntax:

HTML syntax to add an image, example:
<p class='img'><img src='/images/dashboards/features/screenshot-tile-feature-grid.png' alt="Screenshot of tile cards with features.">
Screenshot of tile cards with features.
</p>
Videos
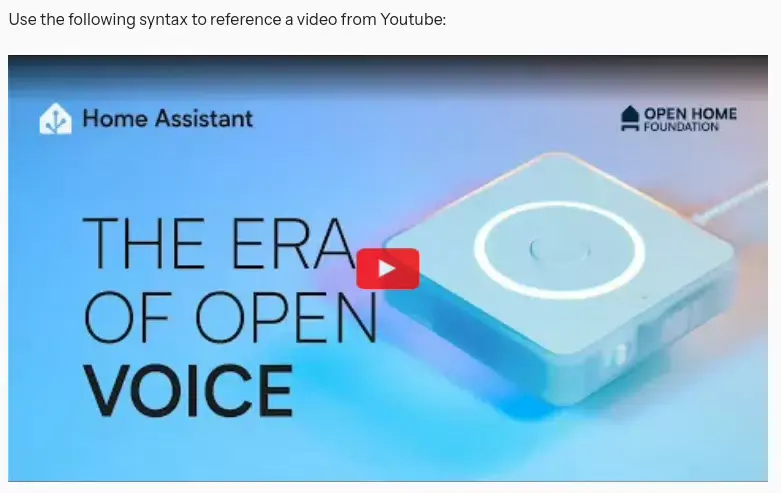
Use the following syntax to reference a video from Youtube. Use videoStartAt to have it start playback at a specific time in the video:
<lite-youtube videoid="ZgoaoTpIhm8" videoStartAt="3907" videotitle="Introducing the Home Assistant Voice Preview Edition - Voice: Chapter 8"></lite-youtube>

Screencast showing a reference to Youtube to start at a specific time
Integration page structure
This section outlines the high-level structure of an integration page. To view example text, refer to the integration documentation template in the homeassistant.io repository under /_integrations/_integration_docs_template.md. The example text includes some reusable text blocks (includes) such as include integrations/config_flow.md and styling elements such as configuration_basic.
The examples are taken from the Integration Quality Scale.
Basic structure of an integration page
- Introduction
- Use case
- Supported/unsupported devices
- Prerequisites
- Configuration
- Configuration options
- Supported functionality
- Actions
- Examples
- Data updates
- Known limitations
- Troubleshooting
- Community notes
- Removing the integration